MAASive round 2
Finally, Ubuntu 12.04 came out! And I was pretty excited to re-try MAAS. Good news! This time, I was able to go further!
Back to MAAS
As reminder, the MAAS purpose extract from the official documentation:
Metal as a Service – MAAS – lets you treat physical servers like virtual machines in the cloud. Rather than having to manage each server individually, MAAS turns your bare metal into an elastic cloud-like resource.
What does that mean in practice? Tell MAAS about the machines you want it to manage and it will boot them, check the hardware’s okay, and have them waiting for when you need them. You can then pull nodes up, tear them down and redeploy them at will; just as you can with virtual machines in the cloud.
When you’re ready to deploy a service, MAAS gives Juju the nodes it needs to power that service. It’s as simple as that: no need to manually provision, check and, afterwards, clean-up. As your needs change, you can easily scale services up or down. Need more power for your Hadoop cluster for a few hours? Simply tear down one of your Nova compute nodes and redeploy it to Hadoop. When you’re done, it’s just as easy to give the node back to Nova.
MAAS is ideal where you want the flexibility of the cloud, and the hassle-free power of Juju charms, but you need to deploy to bare metal.
MAAStatus explained
Before started, as convention, I will call the node deployed by MAAS: MAASlave. As I saw and understood, MAAS gives several status depending on the state of the node.
List of MAAS status:
- Offline (MAC @manually added) - Commissioning
- Never seen (request a PXE boot) - Declared
- Queued - Ready
- Deployed - Allocated to maas
See the detail of each status below.
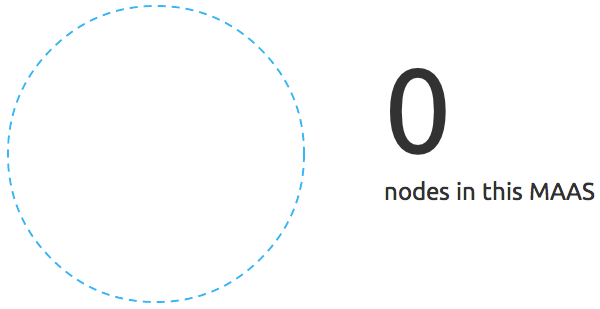
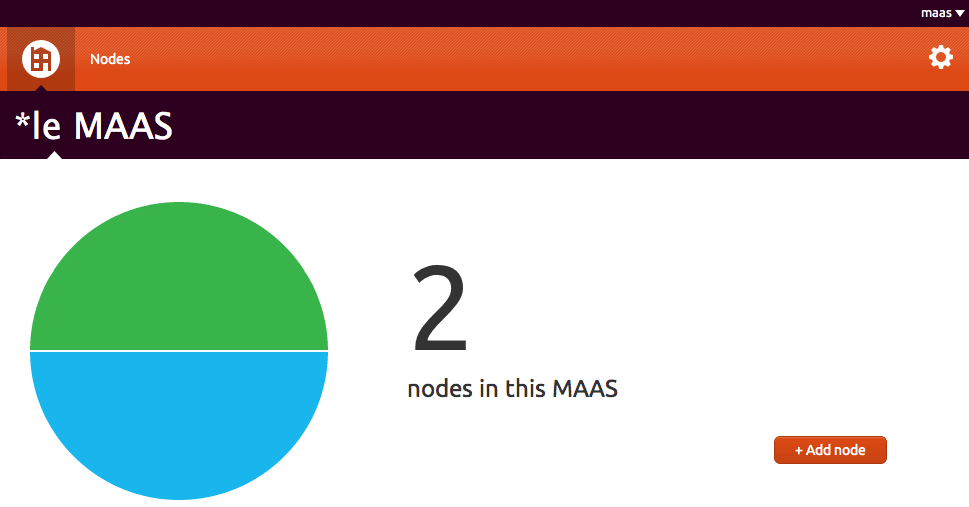
0 nodes in this MAAS
You simply didn’t provide anything yet.
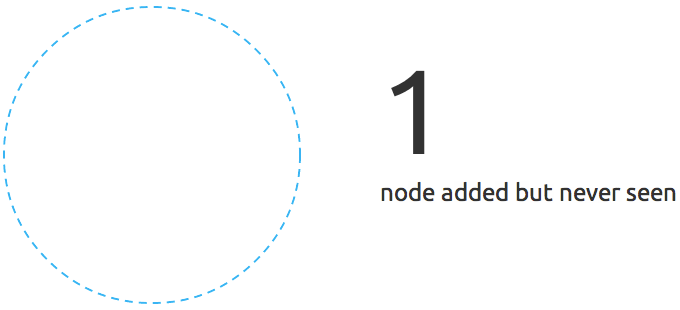
Never seen - Declared
This state appears when a non-maas-register node request a boot from your MAAS pxe server. It’s an interesting state because it allows you to install an operating system without commissioning to the MAAS server. You can also choose the enlist option which will acquire the server to MAAS.
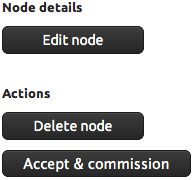
The only thing you have to do is to accept the node via the web gui. So click on Accept & commission
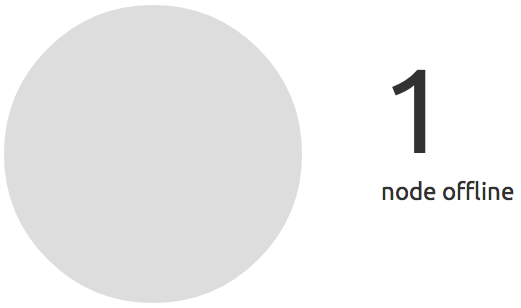
Offline - Commissioning
The node has been added (his MAC address) in MAAS.
It is waiting for booting. This will be the first boot sequence.
You should see something like this at the end of the first quick step.
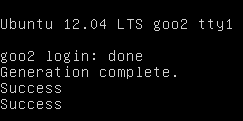
After this one, you will need to relaunch the machine again in order to install the operating system.
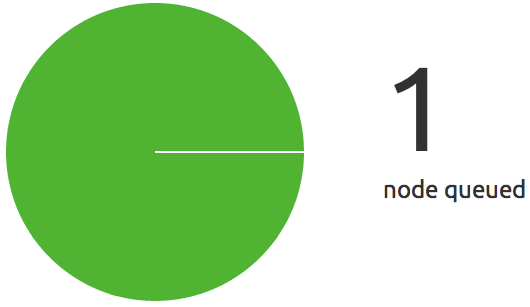
Queued - Ready - One step left to heaven
You booted your MAASlave via PXE, this one got an address from your MAAS server and starting the negociation with it. The new MAASlave was succesfully acquired by the MAAS server in the previous step, now it’s time to install the operating system!
Go grab a coffee and observe the result ~15 minutes later!
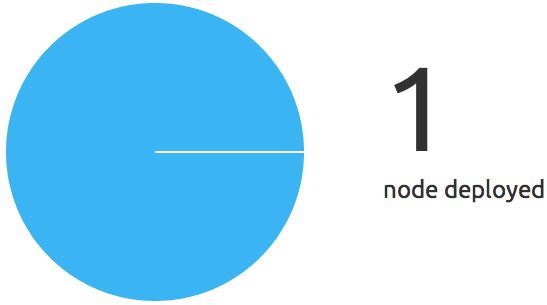
Deployed - Allocated to maas
This is the final stage.
It means that the node marked as deployed has respond to the juju bootstrap offer. This node is ready, you can use it to deploy juju charms. Note that apparently this node has been entirely acquired by Juju and you can’t remove it on the web gui. The only is to kick out the node with juju using juju destroy-unit
Bonus stage, every states

Under the hood
It’s really important to be aware of what happen behind the scene while MAAS is running. It’s all start with the MAAS server, during the installation process of 12.04 will be prompted to choose between a casual installation and a MAAS Server installation or enlistment. With this server come a lot of services like apache, dns, tftp, rabbitmq and an optional dhcp management. MAAS is written in Python and the web gui uses the Django framework. MAAS uses a local database to store all the nodes it will deploy. A node is identified by his MAC address. The best way to configure and manage your MAAS server is use the web gui, there is maas binary but I think it is use for other purpose. The server will be manage by a superuser, the superuser is mandatory, without it you can’t start managing the MAAS server. There is also non-admin user but I didn’t experiment them and I don’t know what they are use for. Your first machine provisionning will be like so:
- Add the MAC address of your server in MAAS
- Startup your node with PXE boot sequence
- DHCP negociation between your MAAS server and the MAASlave
- The MAASlave gets an IP address in the range that you defined in your own DHCP server or during the
maas-dhcp. It also get a hostname, the one select in the web gui or an auto attributed one (by MAAS). Something likenode-a482df4c-9458-11e1-a951-000c290cdd88.local - The MAASlave enters in the
enlistmentstage during which the MAAS server will load the ephemeral image. - This operation will only take few minutes and the node will be shutdown
- The PXE boot will use a netboot image, thoses images are imported via the
maas-import-isoscommand. This command imports ISO into Cobbler. The mini.iso is used because it is a small download, and the rest of the installation is performed over the network and packages are cached using squid. - Re launch the server, you or MAAS, it depends if the WoL is enable or not on your server. Cobbler will load the pre-configured and auto-generated (by profile) preseed file, the url is always like so:
http://192.168.1.100/cblr/svc/op/ks/system/node-a482df4c-9458-11e1-a951-000c290cdd88 - Now wait for the OS installation (ephemeral image)
All the traces of the installation can be followed here /var/log/maas/rsyslog and in /var/log/squid-deb-proxy/access.log
Listed dependancies
As I can remenber there is a lot of similitude with Orchestra. Some service like rabbit-mq has been added:
- apache: 80
- squid: 8000
- dnsmasq: 53 & 67
- sshd
- postgres: 5432
- mass-pserv: 5241
- maas-txlongpoll: 5432
- epmd: 4369
- rabbitmq:
- rsyslog: udp 514
- tftpd: 69
- cobbler: 25151
Also note, that if you decide to install MAAS manually, ~200M will be downloaded.
MAAStarted
The information below are alreday part of the official documentation. I installed MAAS using the CD from Ubuntu Server 12.04 Precise LTS. I assume that you did the same. So after your fresh MAAS installation, tip the following commmands. I also assume that you want let MAAS managing the DHCP from itself to the future nodes.
$ sudo apt-get update && sudo apt-get upgrade -y |
After this, you will maybe need to change the IP address of your MAAS server:
$ sudo dpkg-reconfigure maas |
Install the maas-dhcp agent, cretae a super user and import the isos:
$ sudo apt-get install maas-dhcp -y |
There is a related issue with the cloud-init package version in the epheram build, so it’s better to be up to date and launch thoose commands.
$ sudo maas-import-ephemerals |
Don’t forget to activate the forward in the kernel:
$ sudo iptables -t nat --append POSTROUTING --out-interface eth0 -j MASQUERADE
$ sudo iptables --append FORWARD --in-interface tun0 -j ACCEPT
$ sudo echo 1 > /proc/sys/net/ipv4/ip_forward
$ sudo echo "net.ipv4.ip_forward = 1" /etc/sysctl.conf
$ sudo sysctl -p
net.ipv4.ip_forward = 1
From now, you can boot your MAASlave, this machine will enter in negociation with MAAS server and shutdown. The state of the machine in the Web gui will changed from Commissioning to Ready. Don’t forget to configure the boot sequence on your servers or press the PXE boot key. After the first, MAAS should be available to wake up your server via WoL and installing the needed new system on it. At the end of this installating, a cobbler snippet will disable the PXE boot for the next boot. This snippet is called at the end of the installation (see the preseed file here /var/lib/cobbler/kickstarts/maas.preseed) and located in /var/lib/cobbler/snippets/maas_disable_pxe. Just repeat the process, add the MAC address of your node via the web interface and let’s roll!
Playing with Juju
That’s the most interesting part of the MAAS, the interaction with Juju. Juju provides service orchestration. Juju focuses on managing the service units you need to deliver a single solution, above simply configuring the machines or cloud instances needed to run them. Charms developed, tested, and deployed on your own hardware will operate the same in an EC2 API compatible cloud.
MAAS and Juju will be colocated, both will be running on the same server. But first install it:
$ sudo apt-get install python-software-properties -y
$ sudo add-apt-repository ppa:juju/pkgs && sudo apt-get update && sudo apt-get install juju -y
$ mkdir ~/.juju
Now go to your web gui and generated a new MAAS key. Just keep in mind that one key is for one Juju environment.

Generate a new MAAS key and file the ~/.juju/environment.yaml
environments: |
In order to connect Juju to your instance, you will need ssh-keygen, if you don’t already have ones:
$ ssh-keygen |
Finally, run your Juju environment:
$ juju bootstrap |
Normally during this step, Juju will launch a new machine with Zookeeper and the provisionning agent. The WoL was configured on my machine, so Juju boot it up. So simply manually boot the machine. At the end of the installation, you should see this output in the log and also on the screen:
juju-machine-agent start/running, process 4371 |
After the process the machine is ready:
$ juju status |
Now let’s try to deploy Munin!
$ juju deploy munin |
A new node was automaticaly provisionned by Juju.
Reverse process (a deployed charm), example with a munin charm:
$ juju unexpose munin |
Persistent randomness?
I still do have some issues, usually the same as I had with Orchestra + Juju. The mostly random both solved and unsolved issue was the ssh keys. During the juju bootstrap, Juju is supposed to delivery the ssh public key from the MAAS server to the MAASlave node. But I really often this kind of message from the juju status command:
$ juju -v status |
Sometime doing a
$ juju destroy-environment
$ juju bootstrap
Do the trick but it’s really rare.
Customization & tricks
Put a user password in the preseed file
Since, I have some trouble with juju bootstrap and SSH keys. I don’t want to be stuck with a deployed node, I want to be able to access it.
There 2 things to modify.
By default, the generated user ubuntu has his password disabled and has passwordless admin access via sudo. Go to the preseed configuration file in /var/lib/cobbler/kickstart/maas.preseed and modify this line
d-i passwd/user-password-crypted password !
By this d-i passwd/user-password-crypted password $6$.1eHH0iY$ArGzKX2YeQ3G6U.mlOO3A.NaL22Ewgz8Fi4qqz.Ns7EMKjEJRIW2Pm/TikDptZpuu7I92frytmk5YeL.9fRY4.
Now the user has a password set, the password is ubuntu.
Secondly you have to modify the configuration of the cloud image, do the following steps:
$ sudo mount /var/lib/maas/ephemeral/precise/ephemeral/amd64/20120424/disk.img /mnt/ |
Now go to the ssh configuration file and enable the PasswordAuthentication option, put the Yesvalue instead of No. This sed command will do the trick (modify the path if needed):
$ sudo sed -i s/PasswordAuthentication\ no/PasswordAuthentication\ yes/g /mnt/etc/ssh/sshd_config |
Now you can bootstrap the machine and log in.
Also take a look to this directory /var/lib/cobbler/snippets/ and explore the content of the maas_* scripts. Specially the maas_client_packages file.
Get a machine outside the MAAS autority
Sometimes you will want to use you MAAS server to only deploy operating system for other purpose than your current MAAS cluster. You want this new machine independant.
$ sudo rm /etc/init/{juju-*, cloud-*, zookeeper.conf, avahi-daemon.conf} |
Of course you also have to modify you /etc/network/interface if it’s needed.
Troubleshooting
The issue:
ERROR SSH forwarding error: @@@@@@@@@@@@@@@@@@@@@@@@@@@@@@@@@@@@@@@@@@@@@@@@@@@@@@@@@@@
Solved like this:
rm ~/.ssh/known_hosts
Or using a more elegant way:
ssh-keygen -f "~/.ssh/known_hosts" -R IP_NODE
Rabbitmq issue:
$ sudo rabbitmqctl status |
It means you certainly change your IP address but didn’t modify the /etc/hosts file in consequence.
The issue:
[Thu May 03 16:11:40 2012] [error] Content-Type: text/html; charset=utf-8
[Thu May 03 16:11:40 2012] [error] WWW-Authenticate: OAuth realm="OAuth"
[Thu May 03 16:11:40 2012] [error]
[Thu May 03 16:11:40 2012] [error] Expired timestamp: given 1336047181 and now 1336054300 has a greater difference than threshold 300
Update the time on the MAASlave, edit the /etc/init/cloud-init.conf
pre-start script |
Simply add the IP address of the MAAS server.
At the end, I was pretty enthusiastic to see how things would progress with MAAS. It’s hard to say if MAAS can be concidered as ready for the prime time. I would say that it depends on your needs. For the moment I think I will only use it for deploying operating systems. Maybe it seems a little bit stupid, you might ask why not simply use cobbler? Because this allows me to see how things are growing, to evaluate the stability and new features version after version. And establish whether or not the Juju integration is more efficient. I will probably write other topics about MAAS, so stay tuned!
Comments